Prep Time: 10 minutes
Cook Time: 12 minutes
Total Time: 22 minutes
Servings: 2 people
Calories: Approx. 550 kcal per serving
Introduction
There is something undeniably comforting about a fish finger sandwich. It evokes childhood memories, seaside trips, and the simple joy of a good meal. However, traditional fish fingers are often deep-fried, leaving them heavy and greasy.
Enter the Air Fryer. This recipe transforms the humble frozen fish finger into a crispy, golden masterpiece with a fraction of the oil. By utilizing the intense circulating heat of the air fryer, we achieve a crunch that stands up to the creamy tartar sauce and soft bread.
This isn’t just a recipe; it is a guide to building the perfect sandwich. We will cover the time and intensities required for the air fryer, the layering of ingredients for maximum flavor, and the nutritional breakdown to help you plan your meal. Whether you are using frozen store-bought fingers or making your own breaded fish, this guide will ensure a perfect result.
Ingredients
The Filling
-
8-10 Frozen Fish Fingers: (Choose a high-quality brand, ideally cod or haddock. If using homemade, ensure they are pre-breaded and chilled).
-
1 tbsp Olive Oil Spray: (Optional, for extra crispiness).
The Bread
-
4 Slices of Soft White Bread: (Thick-cut is best to hold the filling, but brioche or wholemeal works well too).
-
2 tbsp Salted Butter: (Softened, for spreading).
The Accompaniments
-
4 tbsp Tartar Sauce: (Store-bought or homemade).
-
1 handful Fresh Lettuce: (Iceberg or Little Gem for crunch).
-
1 tbsp Capers: (Optional, for a briny kick).
-
1 squeeze Lemon Juice: (To cut through the richness).
-
Salt and Black Pepper: (To taste).
Equipment
-
Air Fryer: (Any standard model, basket or oven-style).
-
Tongs: (For flipping the fish).
-
Knife and Board: (For prep).
-
Butter Knife.
Instructions
Step 1: Preparation (Time: 2 Minutes | Intensity: Low)
Preheat your air fryer. Set the temperature to 200°C (390°F). Allow it to preheat for at least 3 minutes. Preheating is crucial for the “shock” effect that makes the breading crispy immediately. While the air fryer heats, remove your fish fingers from the freezer. Do not thaw them; they must go in frozen.
Step 2: The First Cook (Time: 6 Minutes | Intensity: High)
Place the frozen fish fingers in a single layer in the air fryer basket. Ensure they are not touching; overcrowding creates steam, which makes them soggy. If you have a large batch, cook in two batches.
-
Setting: 200°C (390°F)
-
Action: Cook for 6 minutes. Do not open the basket during this time. The high intensity of the heat is forming the crust.
Step 3: The Flip and Crisp (Time: 6 Minutes | Intensity: High)
After 6 minutes, pull the basket out. The fingers should be starting to turn golden. Using tongs, flip each fish finger over to ensure even cooking. If you are using the olive oil spray, give them a very light mist now (this helps browning).
-
Setting: 200°C (390°F)
-
Action: Cook for a further 5-6 minutes. Keep an eye on them towards the end. You want a deep golden brown and a audible crunch when tapped. Total cook time is roughly 12 minutes, depending on the thickness of the finger.
Step 4: The Bread Prep (Time: 2 Minutes | Intensity: Low)
While the fish is finishing its final crisp, prepare the bread. Spread a generous layer of salted butter on one side of each slice of bread. Butter acts as a barrier, preventing the bread from getting soggy from the tartar sauce and fish moisture.
Step 5: The Sauce and Assembly (Time: 3 Minutes | Intensity: Medium)
Once the fish fingers are done, remove them from the air fryer and let them rest for 1 minute. This allows the internal steam to settle so you don’t burn your mouth on the first bite.
-
Sauce: Spread a thick layer of tartar sauce on the buttered side of two slices of bread (the bottom halves).
-
The Base: Place a layer of lettuce on top of the sauce. This creates a “bed” for the fish and prevents the bottom bread from getting soggy.
-
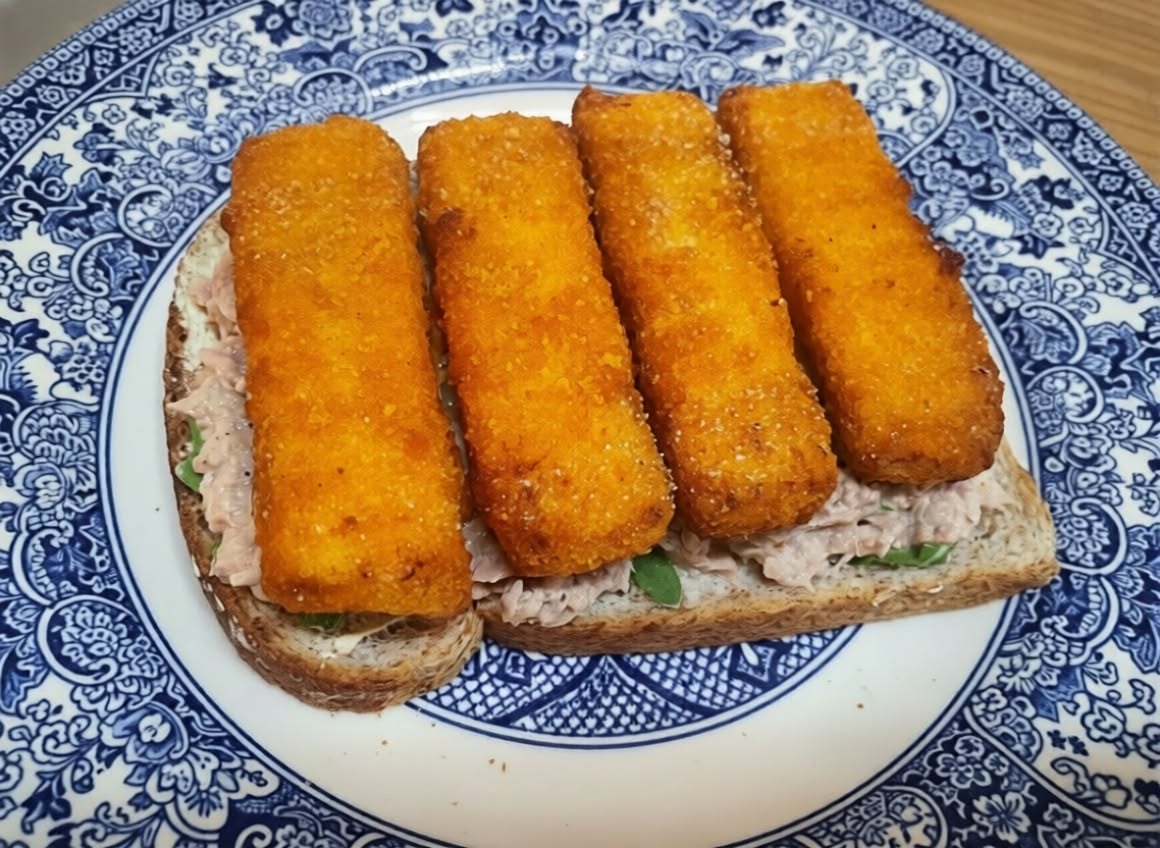
The Fish: Place 4-5 fish fingers side-by-side (or slightly overlapping) on top of the lettuce.
-
The Zing: Squeeze a little lemon juice over the fish and scatter with capers (if using). Season with a pinch of salt and black pepper.
-
The Top: Place the remaining slices of bread on top, buttered side down.
Step 6: The Press and Cut (Time: 1 Minute | Intensity: Low)
Press the sandwich down gently with your hand. This compacts the ingredients and ensures everything stays together when you bite into it. Cut the sandwich in half diagonally (this is scientifically proven to taste better) and serve immediately.
Recipe Notes & Tips
-
The “Soggy” Factor: The biggest enemy of a fish finger sandwich is moisture. The butter barrier and the lettuce layer are non-negotiable steps. Do not skip them.
-
Air Fryer Variance: Every air fryer is different. Your first batch might take 10 minutes, or it might take 14. Check at the 10-minute mark. If the fingers are very thick, add 2 minutes to the total time.
-
Cheese Lover’s Twist: If you want a Fish Finger Melt, add a slice of cheddar cheese on top of the fish fingers for the last 1 minute of cooking (intensity: medium). Let it melt slightly before removing.
-
Homemade Fish Fingers: If you are breading fresh fish, you will need to cook them slightly longer (about 15 minutes) at a slightly lower temperature (180°C/350°F) to ensure the fish cooks through without burning the breadcrumbs.
Nutrition (Approximate)
Please note: Nutritional values are estimates and will vary based on the specific brand of fish fingers, bread, and amount of butter/sauce used.
-
Serving Size: 1 Sandwich (using 4-5 fish fingers)
-
Calories: 550 kcal
-
Total Fat: 24g
-
Saturated Fat: 7g
-
-
Cholesterol: 45mg
-
Sodium: 800mg (varies heavily based on fish finger brand)
-
Total Carbohydrates: 60g
-
Dietary Fiber: 4g
-
Sugars: 5g
-
-
Protein: 22g
-
Vitamin D: 10% DV
-
Calcium: 15% DV
-
Iron: 20% DV