Prep Time: 15 minutes | Rise Time: 2–18 hours (see notes) | Bake Time: 45 minutes | Total Time: 3 hours (minimum) to overnight
Yield: 1 large round loaf (8–10 servings) | Intensity Level: Easy–Moderate
Introduction
There is something almost magical about pulling a loaf of crusty bread from your own oven — the crackle of the crust as it cools, the deep golden-brown color, the airy crumb waiting inside. This recipe uses the no-knead, Dutch-oven method made famous by Jim Lahey and refined by home bakers everywhere. It requires only four ingredients, no stand mixer, and no kneading. Time does the work: a long, slow fermentation (anywhere from 3 to 18 hours) develops complex flavor and an open, chewy crumb, while a preheated Dutch oven traps steam to create that shatteringly crisp crust. The result is a bakery-quality artisan loaf that costs pennies and comes together with about 15 minutes of actual hands-on effort. If you’ve never baked bread before, this is the perfect place to start — and if you’re a seasoned baker, this foolproof method will become your weeknight staple.
Ingredients
For the Dough
-
3 cups (400 g) bread flour (or all-purpose flour; bread flour gives a chewier crumb)
-
1½ tsp (9 g) fine sea salt
-
½ tsp (2 g) instant yeast (or active dry yeast)
-
1½ cups (355 ml) lukewarm water (about 100°F / 38°C)
Optional Add-Ins
-
1 tbsp olive oil (for a slightly softer crust)
-
1 tbsp honey or sugar (for a touch of sweetness and faster browning)
-
½ cup seeds, olives, or grated cheese (fold in during shaping)
Equipment
-
Large mixing bowl
-
Wooden spoon or spatula
-
Plastic wrap or damp kitchen towel
-
4–5 quart Dutch oven with lid (cast iron or enameled)
-
Parchment paper
-
Bench scraper (optional)
-
Instant-read thermometer (optional)
Time & Intensity Breakdown
| Stage | Time | Intensity | What’s Happening |
|---|---|---|---|
| Mix dough | 5 min | Low | Stir until shaggy — no kneading |
| First rise | 2–18 hrs | Low (passive) | Fermentation develops flavor |
| Shape loaf | 5 min | Moderate | Fold and form a tight round |
| Second rise | 30–60 min | Low (passive) | Dough relaxes and puffs |
| Preheat Dutch oven | 30 min | Low (passive) | Oven and pot reach 450°F |
| Bake covered | 30 min | Low (passive) | Steam creates the crust |
| Bake uncovered | 15 min | Low (passive) | Deep golden browning |
| Cool | 30–60 min | Low (passive) | Crust sets; crumb finishes cooking |
Total active time: ~15 minutes | Total passive time: ~2 hours 45 minutes to 19 hours
Instructions
Step 1: Mix the Dough (5 minutes | Low Intensity)
In a large bowl, whisk together the flour, salt, and yeast. Pour in the lukewarm water and stir with a wooden spoon or spatula until a shaggy, sticky dough forms — about 30 seconds. There should be no dry flour patches, but the dough will look rough and messy. Do not knead. That’s the whole point of this method: gluten develops on its own during the long fermentation. If using optional olive oil or honey, stir it in now.
Step 2: First Rise (2–18 hours | Low Intensity, Passive)
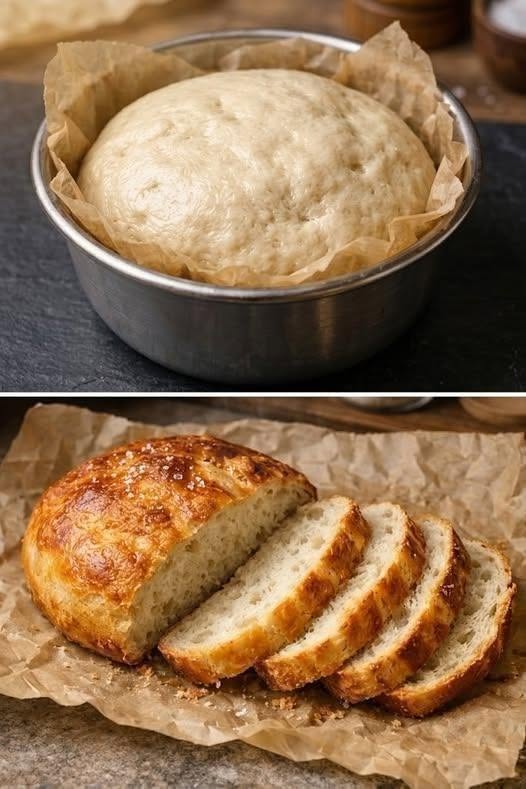
Cover the bowl tightly with plastic wrap or a damp kitchen towel. Let it rise at room temperature for at least 2–3 hours for a same-day loaf, or up to 18 hours for maximum flavor. The dough is ready when it has doubled in size, looks bubbly on top, and has a slightly sour, yeasty aroma. A long overnight rise in a cool kitchen (around 65–70°F) produces the best flavor — plan accordingly. If your kitchen is warm, a shorter rise is fine.
Step 3: Shape the Loaf (5 minutes | Moderate Intensity)
Lightly flour your work surface and scrape the dough out of the bowl with a spatula. It will be very sticky and loose. Sprinkle a little flour on top, then fold the dough onto itself four times — fold the top edge to the center, then the bottom, then each side — turning the dough 90° between folds. This builds tension. Flip the dough seam-side down and use your hands to gently tuck and round it into a tight ball. Don’t over-handle it; a light touch preserves the air bubbles you worked so hard to create.
Step 4: Second Rise (30–60 minutes | Low Intensity, Passive)
Place the shaped loaf seam-side down on a sheet of parchment paper. Cover loosely with a clean towel and let it rest for 30–60 minutes while the oven preheats. The dough should look slightly puffed, not fully doubled — it will continue to rise in the oven (called “oven spring”).
Step 5: Preheat the Dutch Oven (30 minutes | Low Intensity, Passive)
About 30 minutes before baking, place your Dutch oven (with its lid) on the middle rack of the oven and preheat to 450°F (230°C). The pot must be scorching hot — this is what creates the dramatic rise and crisp crust. Do not skip this step.
Step 6: Bake Covered (30 minutes | Low Intensity, Passive)
Carefully remove the hot Dutch oven from the oven (use thick oven mitts — it’s dangerously hot). Lift the loaf by its parchment paper and lower it into the pot. Score the top with a sharp knife or lame — a single ½-inch-deep slash or a simple cross — to allow steam to escape. Cover with the lid and bake for 30 minutes. The trapped steam creates the signature crackly crust.
Step 7: Bake Uncovered (15 minutes | Low Intensity, Passive)
Remove the lid and bake another 15 minutes, until the loaf is deep golden-brown and an instant-read thermometer inserted into the center reads 200–210°F (93–99°C). If the top is browning too fast, tent loosely with foil.
Step 8: Cool (30–60 minutes | Low Intensity, Passive)
Lift the loaf out using the parchment and transfer to a wire rack. Resist cutting into it for at least 30 minutes — the bread is still cooking inside as it cools, and cutting too early yields a gummy crumb. Listen for the crust to crackle as it cools; that’s the sound of a job well done.
Serving Suggestions
Slice thick and serve warm with salted butter, olive oil and balsamic, or dipped in soup. It’s spectacular for avocado toast, grilled cheese, or torn into croutons. Day-old bread makes excellent panzanella or breadcrumbs.
Storage & Reheating
-
Room temperature: Store cut-side down on a board or in a paper bag for up to 2 days. Plastic bags soften the crust — avoid them.
-
Freezer: Slice and freeze in a zip-top bag for up to 3 months. Reheat slices directly in a toaster.
-
Revive the crust: Sprinkle the loaf with water and bake at 350°F (175°C) for 8–10 minutes.
Nutrition Information (Per Slice, Based on 10 Slices)
Values are estimates and will vary by flour brand and slice size.
| Nutrient | Amount per Slice |
|---|---|
| Calories | ~145 kcal |
| Total Fat | ~0.5 g |
| — Saturated Fat | ~0.1 g |
| Cholesterol | 0 mg |
| Sodium | ~290 mg |
| Total Carbohydrates | ~30 g |
| — Fiber | ~1 g |
| — Sugars | ~0.2 g |
| Protein | ~5 g |