Prep Time: 20 minutes
Rest Time: 1 hour 30 minutes
Cook Time: 5–8 minutes per batch
Total Time: Approximately 2 hours
Ingredients
For the Dough:
-
500g (4 cups) Bread flour (or all-purpose flour, though bread flour yields a chewier texture)
-
300ml (1 ¼ cups) Warm water (approx. 110°F / 45°C)
-
7g (2 ¼ tsp) Active dry yeast (one standard packet)
-
1 tsp Granulated sugar (to feed the yeast)
-
2 tsp Fine sea salt
-
2 tbsp Olive oil (plus extra for greasing the bowl)
For Dusting:
-
Extra flour for rolling out
-
Semolina flour (optional, for dusting the baking surface)
Equipment Needed
-
Large mixing bowl
-
Stand mixer with dough hook (optional, but recommended)
-
Clean kitchen towel or plastic wrap
-
Rolling pin
-
Baking stone or heavy-duty baking sheet
-
Sharp knife or bench scraper
Instructions
Step 1: Activate the Yeast (Time: 5–10 minutes)
In a small bowl, combine the warm water and sugar. Sprinkle the yeast over the top and stir gently. Let it sit for 5–10 minutes until the mixture becomes frothy and smells slightly yeasty. If the yeast does not foam, it is likely dead, and you should start over with fresh yeast.
Step 2: Mix the Dough (Time: 5 minutes)
In a large mixing bowl (or the bowl of your stand mixer), combine the flour and salt. Make a well in the center and pour in the yeast mixture and the olive oil.
-
If using a stand mixer: Mix on low speed with the dough hook until a shaggy dough forms, then increase to medium speed and knead for 5–7 minutes.
-
If mixing by hand: Stir with a wooden spoon until the dough comes together, then turn it out onto a floured surface and knead vigorously for 8–10 minutes.
Intensity Check: The dough should be smooth, slightly tacky but not sticky, and should spring back when poked. If it is too sticky, add flour one tablespoon at a time. If it is too dry, add water one teaspoon at a time.
Step 3: First Rise (Time: 60–90 minutes)
Lightly grease a large bowl with olive oil. Place the dough ball in the bowl, turning it once to coat the surface with oil. Cover the bowl with a clean kitchen towel or plastic wrap. Place it in a warm, draft-free spot.
Intensity: Low. Let the dough rise until it has doubled in size. This typically takes 60 to 90 minutes, depending on the temperature of your kitchen. On a cold day, you can place the bowl in an oven that has been turned off but has the oven light on.
Step 4: Divide and Shape (Time: 10 minutes)
Once the dough has doubled, punch it down gently to release the air. Turn it out onto a lightly floured surface. Using a sharp knife or bench scraper, divide the dough into 8 equal pieces (about 100g each).
Roll each piece into a smooth ball. This is important for the final texture. Place the balls on a lightly floured tray, cover them with a towel, and let them rest for 10 minutes. This relaxes the gluten, making them easier to roll out.
Step 5: Pre-Heat and Roll (Time: 5 minutes + Oven Pre-heat)
Crucial Step: Place your baking stone or a heavy-duty baking sheet on the middle rack of your oven. Preheat the oven to 500°F (260°C) . Let the oven preheat for at least 20–30 minutes. A scorching hot oven is the secret to getting that pocket to form.
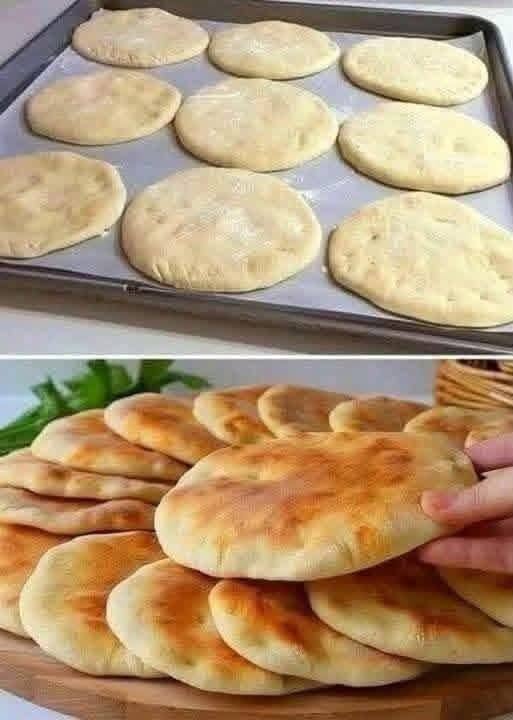
While the oven heats, roll out the dough balls. On a lightly floured surface, roll each ball into a disc about ¼ inch (6mm) thick and 6–7 inches in diameter. Do not roll them too thin, or they will tear; do not roll them too thick, or they won’t puff. Let the rolled discs rest for 5 minutes before baking.
Step 6: Baking (Time: 3–5 minutes per batch)
Carefully open the oven door. Working quickly, place 2 to 3 pita discs directly onto the hot baking stone or sheet pan. Close the door immediately to trap the steam.
Intensity Check: Watch through the oven window. The pita should begin to puff up within 60–90 seconds. It will balloon into a full circle. Allow it to bake for another 1–2 minutes until it is lightly golden on the bottom.
Time Total per Batch: 3 to 5 minutes. Do not overbake, or the pita will become brittle.
Step 7: The “Towel Trick” (Time: 5 minutes)
As soon as you remove a pita from the oven, immediately wrap it in a clean, dry kitchen towel. This traps the steam and keeps the bread soft and pliable. Repeat with the remaining dough. If the pitas are browning too quickly on the bottom, reduce the oven temperature to 450°F (230°C) for the remaining batches.
Step 8: Cooling and Storage
Allow the pitas to cool completely inside the towel. Once cool, store them in a plastic zip-top bag or an airtight container at room temperature for up to 2 days. To reheat, sprinkle with water and warm in a 350°F (175°C) oven for 3 minutes, or microwave for 15 seconds.
Nutrition Information (Per Serving)
Serving Size: 1 pita (approx. 100g)
Servings Per Recipe: 8
-
Calories: 270 kcal
-
Total Fat: 4.5 g (Saturated Fat: 0.6 g)
-
Cholesterol: 0 mg
-
Sodium: 480 mg
-
Total Carbohydrates: 48 g
-
Dietary Fiber: 2 g
-
Total Sugars: 1 g
-
Protein: 8 g