Prep Time: 10 minutes
Cook Time: 35-40 minutes
Total Time: 50 minutes
Servings: Makes about 1 ½ cups (12 servings of 2 tablespoons each)
Introduction
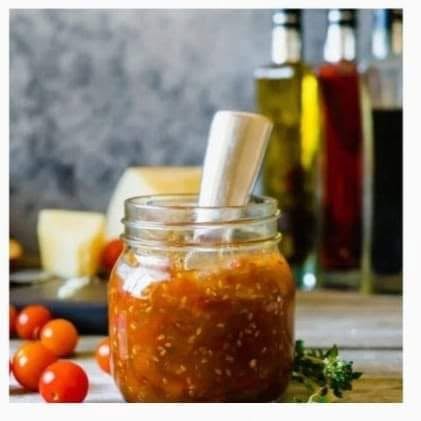
If you have ever found yourself staring at an overflowing bowl of cherry tomatoes—from your garden, the farmers market, or a generous neighbor—this Small Batch Cherry Tomato Jam is the answer. Sweet, tangy, and slightly savory, this jam transforms humble cherry tomatoes into a glossy, jewel-toned spread that elevates everything it touches. It is the perfect way to preserve the bright flavors of summer in a small, manageable batch that fits in a single saucepan.
Unlike traditional fruit jams, tomato jam has a complex flavor profile that balances sweetness with acidity and a hint of warmth from spices. Spread it on toast with ricotta, swirl it into yogurt, serve it alongside cheese and crackers, or use it as a glaze for grilled chicken or pork. This recipe makes just enough to enjoy now and share a jar with a friend, without requiring a full day of canning. It is approachable, versatile, and downright delicious—a true pantry treasure that proves small batches can deliver big flavor.
Ingredients
For the Jam:
-
2 lbs cherry or grape tomatoes (about 6 cups), rinsed
-
¾ cup granulated sugar (adjust to taste)
-
2 tablespoons fresh lemon juice (about 1 lemon)
-
1 tablespoon balsamic vinegar
-
2 cloves garlic, minced
-
1 teaspoon salt
-
½ teaspoon black pepper
-
¼ teaspoon ground cinnamon (optional, for warmth)
-
¼ teaspoon red pepper flakes (optional, for heat)
-
1 sprig fresh rosemary or basil (optional)
For Canning (if preserving):
-
2 half-pint (8 oz) glass canning jars with lids and bands, sterilized
-
Large canning pot with a rack
-
Jar lifter and funnel
-
Bottled lemon juice (1 tablespoon per half-pint jar) — for safe water-bath canning
Equipment
-
Large, heavy-bottomed saucepan or Dutch oven
-
Wooden spoon or spatula
-
Potato masher
-
Immersion blender (optional, for a smoother texture)
-
Canning jars and lids
-
Large water-bath canning pot
-
Funnel and jar lifter
-
Measuring cups and spoons
Instructions
Phase 1: Prep the Ingredients (Time: 10 Minutes | Intensity: Low)
-
Wash the Tomatoes: Rinse the cherry tomatoes thoroughly under cold running water. Remove any stems and discard any bruised or split tomatoes.
-
Halve the Tomatoes: Cut each cherry tomato in half. If you prefer a smoother jam, you can leave them whole and mash them later, but halving helps them break down faster and more evenly.
-
Sterilize the Jars: If you plan to can the jam, wash the jars, lids, and bands in hot, soapy water. Sterilize by boiling in a large pot of water for 10 minutes, or run through a dishwasher on the hottest setting. Keep jars hot until ready to fill.
-
Measure the Ingredients: Have all ingredients measured and ready, as the jam requires occasional stirring but not constant attention.
Phase 2: Cook the Jam (Time: 35-40 Minutes | Intensity: Medium)
-
Combine Ingredients: In a large, heavy-bottomed saucepan, combine the halved cherry tomatoes, sugar, lemon juice, balsamic vinegar, minced garlic, salt, black pepper, cinnamon (if using), and red pepper flakes (if using). Stir to combine.
-
Bring to a Simmer: Place the saucepan over medium heat and bring the mixture to a simmer, stirring occasionally. The tomatoes will begin to release their juices.
-
Mash: Once the tomatoes have softened (about 10 minutes), use a potato masher to crush them to your desired consistency. For a chunky jam, mash lightly; for a smoother jam, mash more thoroughly or use an immersion blender.
-
Reduce: Reduce the heat to medium-low and simmer for 25 to 30 minutes, stirring occasionally to prevent scorching. The jam is ready when it has thickened significantly, coats the back of a spoon, and a line drawn through it on a plate holds its shape.
-
Add Herbs: If using, add the rosemary sprig or basil leaves during the last 10 minutes of cooking for a subtle herbal note. Remove before filling the jars.
Phase 3: Test & Adjust (Time: 5 Minutes | Intensity: Low)
-
Test the Set: Place a small plate in the freezer for a few minutes. Spoon a small amount of jam onto the cold plate and return to the freezer for 1 minute. Push your finger through the jam—if it wrinkles and holds its shape, it is ready. If it is too runny, continue simmering for another 5-10 minutes and test again.
-
Taste: Taste the jam and adjust the sweetness, acidity, or spice to your preference. Add a splash more lemon juice for brightness or a pinch more sugar if it is too tart.
Phase 4: Fill the Jars (Time: 10 Minutes | Intensity: Medium-High)
Note: If you are not canning, skip to Phase 5. The jam can be stored in the refrigerator for up to 3 weeks.
-
Add Lemon Juice: Add 1 tablespoon of bottled lemon juice to the bottom of each sterilized half-pint jar. This ensures the acidity level is safe for water-bath canning.
-
Fill the Jars: Using a funnel, carefully ladle the hot jam into the hot jars, leaving ¼ inch of headspace.
-
Remove Air Bubbles: Gently tap the jars on the counter or run a plastic knife around the inside edge to release air bubbles. Wipe the rims clean with a damp cloth.
-
Seal: Place the lids on the jars and tighten the bands until fingertip-tight.
Phase 5: Water-Bath Canning (Time: 15 Minutes | Intensity: Medium-High)
-
Prepare the Water Bath: Fill a large canning pot with water and bring it to a boil. Make sure there is enough water to cover the jars by at least 1 inch.
-
Process: Carefully lower the jars into the boiling water bath using a jar lifter. Process half-pint jars for 15 minutes (adjust for altitude if necessary: add 5 minutes for 1,000-3,000 ft, 10 minutes for 3,000-6,000 ft, and 15 minutes above 6,000 ft).
-
Cool & Check Seals: Remove the jars from the water bath and place them on a towel to cool undisturbed for 12-24 hours. Check the seals by pressing the center of each lid—it should not pop up. If any jars did not seal, refrigerate them and use within 3 weeks.
Phase 6: Serve (Time: 2 Minutes | Intensity: Low)
-
Serve: Spoon the jam onto crostini, swirl it into yogurt, spread it on sandwiches, or serve it alongside cheese and crackers. Enjoy!
Flavor Variations
-
Smoky Tomato Jam: Add ½ teaspoon of smoked paprika and a pinch of cayenne pepper for a deep, smoky flavor.
-
Herb-Forward: Add 1 teaspoon of chopped fresh thyme or oregano during the last 10 minutes of cooking.
-
Sweet & Spicy: Increase the red pepper flakes to ½ teaspoon and add 1 tablespoon of honey for a sweet-heat balance.
-
Balsamic-Rosemary: Double the balsamic vinegar and add an extra rosemary sprig for a rich, aromatic jam.
-
Low-Sugar: Reduce the sugar to ½ cup and add 1 tablespoon of chia seeds to help thicken the jam naturally.
Nutrition
Note: Nutritional information is an estimate based on 2 tablespoons of jam.
Serving Size: 2 tablespoons
Calories: 55
Total Fat: 0g
Saturated Fat: 0g
Cholesterol: 0mg
Sodium: 85mg
Total Carbohydrates: 14g
Dietary Fiber: 1g
Sugars: 12g
Protein: 1g